


Google Tag Manager (GTM) is a free platform that lets you create and manage tags on your company website in just a few clicks, all on your own!
GTM enables you to better understand how users interact with the elements of your website, offering you more in-depth tracking on basic interactions compared to GA4 (Google Analytics 4), taking your analytics capability to the next level.
In this article, you’ll find the complete guide to Google Tag Manager, from its mission to to tips on how to use it optimally.
What is Google Tag Manager?
Google Tag Manager is different from Google Analytics 4. First of all, it’s important to understand that, unlike Google Analytics, Mixpanel, Adobe Analytics, Mailchimp, WordPress and all the other tools you’re currently using, Google Tag Manager isn’t tasked with interpreting the data it receives. Rather, it’s a tool for creating, managing and transmitting this data.
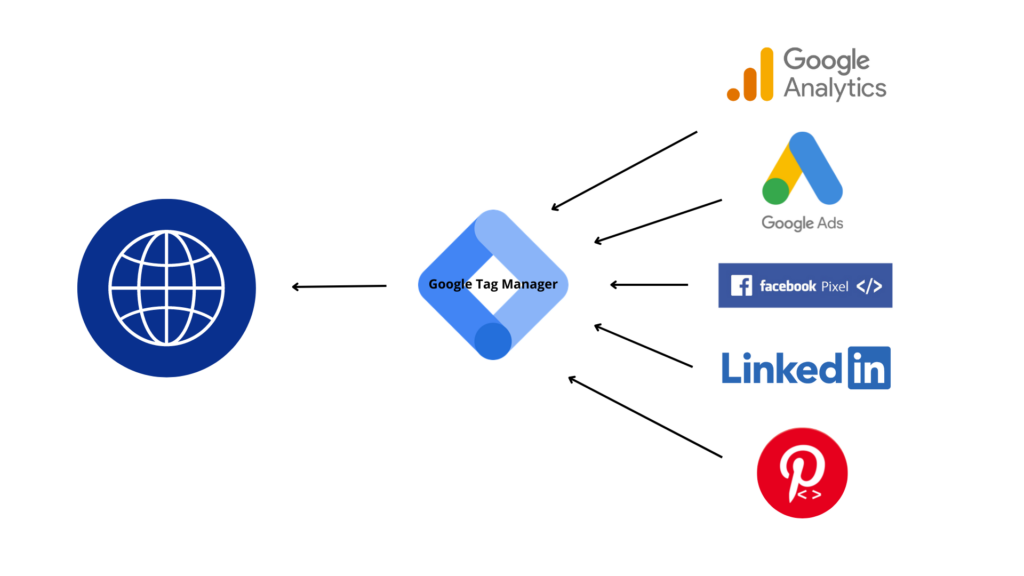
Currently, commonly used tools such as Meta, Google Analytics and Mailchimp, etc., don’t always fully capture what’s happening on your website. In many cases, the data needed to understand what users are doing on your site is not being sent to them, and even when some information is sent, it is often misinterpreted by these external analysis tools. In such cases, Google Tag Manager acts as a “universal translator,” enabling data to be collected and relevant information to be passed on in a way that can be understood by your preferred marketing tools, as illustrated in the diagram below.
The 3 main components of GTM :
- Tags are a snippet of code that is added to a page on your website to enable you to track specific actions, such as newsletter subscriptions.
- The trigger is what indicates the activation of the tags. For example: “Each time a user clicks on Add to cart” is the trigger for the “ajout_panier” tag.
- Variables are those that define the starting environment for event tracking. Most are already integrated into the tool, but some can also be customized.
Why use Google Tag Manager?
GTM is a tool with several advantages:
- Free of charge, it takes the analysis of your website’s events to a new level without the dependency on developers.
- GTM can be used for different data streams, websites and mobile applications.
- Variables in GTM are predefined, making tag integration easy.
- GTM is adapted to Google Analytics 4, simplifying the bridge between both tools, but also works with other non-Google tools.
- The tool provides “debug mode” functionality for testing and debugging tags that aren’t working properly.
- Access management is secure and easy to configure according to each user’s responsibilities.
Google Tag Manager = Centralized tracking
In a nutshell, Google Tag Manager is a free tool from Google that lets you collect and transfer data to your preferred external marketing tools, efficiently add and manage code tags on your website, and trigger certain events when your visitors perform specific actions on your website. There are many reasons to use Google Tag Manager, but there are a number of limitations, such as technical problems that can be difficult to solve without the help of developers, and website slowdowns as various tags are loaded.
How do I install Google Tag Manager and the tracking code on my site?
To set up tracking, you first need to have a website and know which events you want to track, in addition to those already configured on Google Analytics 4. Then, simply follow these steps:
-
Creating a GTM account
To create an account on Google Tag Manager, you need to go to their website and follow the steps for setting up an account under “Create an account.” Once your account has been created, the container snippet to be added to your website pages will appear in the form of a pop-up, with one part for the <head> element and one part for the <body> element. Once your extracts have been installed, either manually or via a plugin, you can start creating your tags.
-
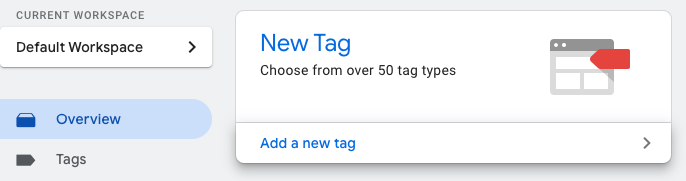
Tag creation
To add a tag, go to the tag tab, under “Add a new tag.” You’ll first need to give it a name, then fill in the two fields that are the tag configuration and the trigger. Several configuration options are available, ranging from GA4 to custom HTML code. Next, select the appropriate trigger associated with your tag.
To avoid getting mixed up among your tags, we advise you to follow a standardized nomenclature to differentiate them from one another. For example, for events originating from a GA4 configuration, add “GA4” to the beginning of the title of each of your tags.
-
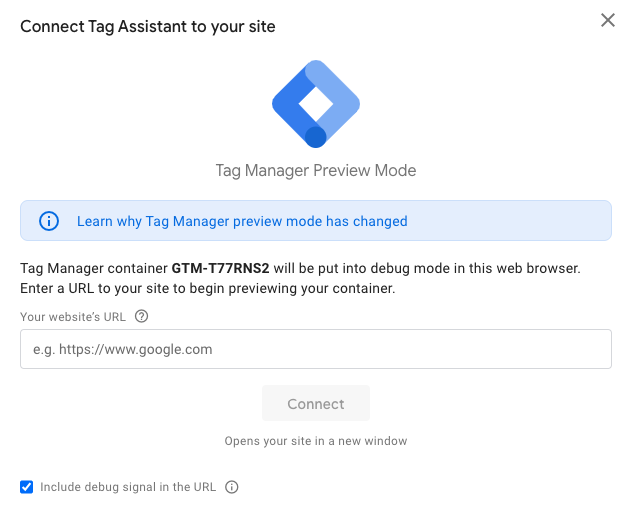
Debug Mode
Once you’ve created your tags, you can switch to “Debug Mode” to check that your tags are triggered at the desired moment. Simply click on “Preview,” perform several actions on your website and check that the tags are active. For example, if you’ve added an “add_basket” tag, it should be triggered when a user clicks on an add-to-basket button on your website. This step is essential to ensure that the actions you wish to track are correctly implemented.
GTM is waiting for you!
Here’s hoping that this first introduction to Google Tag Manager has convinced you of the relevance of this free tool offered by Google. If so, install your tracking code today and start playing around with the platform.
If you’d like to learn more, our analytics experts can give you the tips and tools you need to get your tracking job done right.